
a new day a new hulk
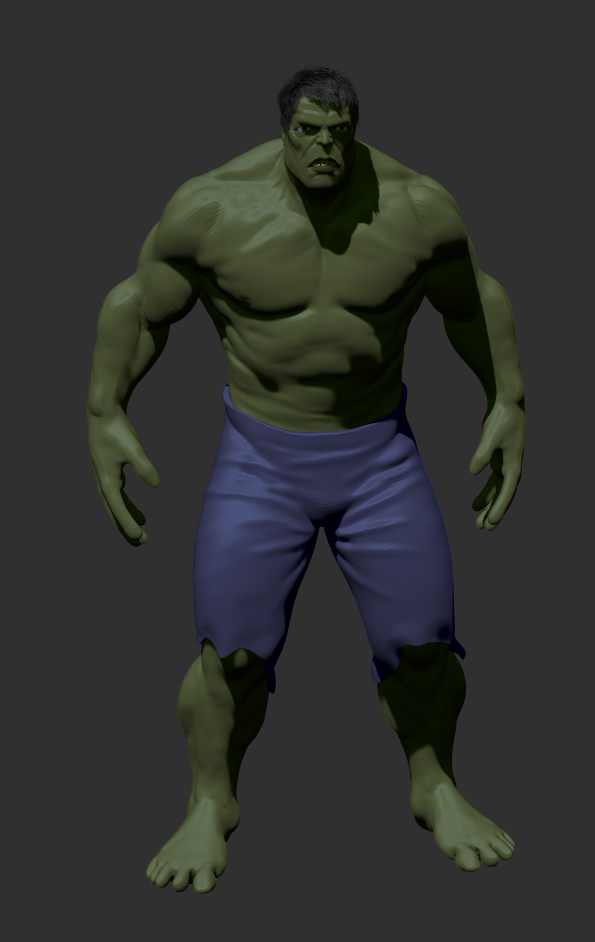
Day 12: New Pose and exterior light test
Major overhaul on the pose and overall design of the head .Less action pose more bodybuilder neutral pose. Couldn't lock down design on thepectoralis major partially because its hard for me to model in that bend pose. It's a hard way to find the right balance between anatomical correct muscle and stylish proportion. I guess I should have start the other way around modelling a realistic human then transform into Hulk proportion.I love the new pose and probably stick with it for a while.
Finally I can get a trial of Arnold renderer to try for myself. Convert all Vray shaders and I absolutely love it ! Amazed by the speed an quality of this renderer. For more example check google
here

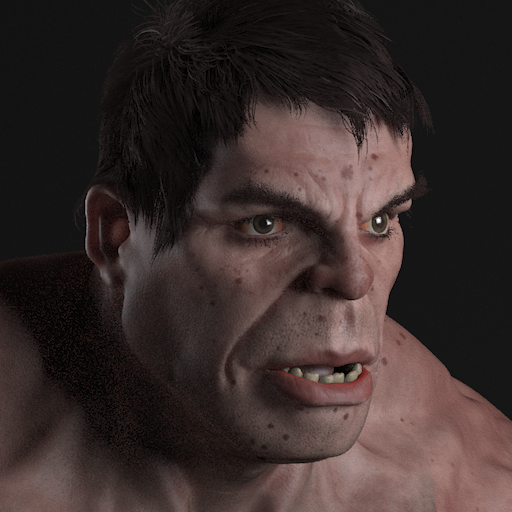
Day 11: Eyeball and Teeth modelling/Shading
-Reduced pores bump intensity
-Tweak eyeshader
-Add tearlines


Day 10: Eyeball and Teeth modelling/Shading
-Reduced eyeball size
-Mouth shape less underbite.
-Less wrinkle thickness on cheeks


Day 10: Bump shader and skin wrinkles
Here is a crop of a 4K render. Click on it for a bigger version.


Day 9: Head details & Facial hair test

Day 8: Mudboxing & Shader tweaking
Day 7: Texturing The Pink Hulk
My current workflow for texturing human characters is always
limited to mudbox 4K per UV layout. This time in order to crank
up more resolution. I'm benefitting from the fact that you can use
the UV space beyond 0-1. To avoid resolution difference among
all patches maintaining the UV ratio is important. Each patch is
now 4K x 7 is effectively 28 K :).

Before I really finalize my modelling and texturing. It's good to
see your model in context. This mean setup an lighting rig for
previewing textures is a must for me.
This typical studio turntable setup should give me a good preview
of what issues I can expect when the character moves through light
and shadows. Also using SSS is not so straight forward as just
texturing diffuse channels. So a solid SSS shader with the right
scale is very important.
So here you see my reddish skin shader for the hulk. I think starting
with human skin approach will gives me likely more realistic look
then going straight for green. There are no real life reference for a
green man unless you paint your friend green :).
So I decide to HSV shift my texture once the human version is done.

Day 6:
New beauty render with some mockup chest hair.

Day 5:
Sculpting hands details.Trying the new BPR shadows settings


Day4:
Pants details added, simpel polypaint. Update arm & hand anatomy a bit. Make the hand beefier and more suitable for his
big body.


Day 3
Some update on the hands and feets:

Day 2


It's been a while that I post new stuff. I've working on a dutch feature film for couple of months. Title of the movie will be announce soon. In the meanwhile I found
a little time (2 hrs) to remodel my Hulk.I went back few iterations and found the first version I used and add extra geometry to support extra details like toes and mouth.
I don't the proportion and this time I want to go over the top a bit. Stylized and new pose.


No comments:
Post a Comment